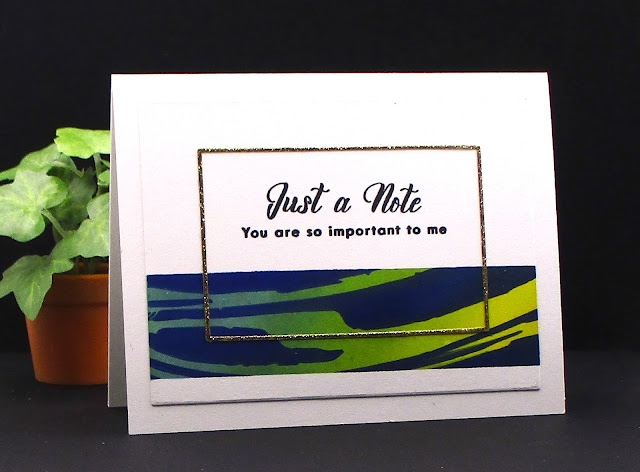
Hello and welcome! I have completed the first level of the Altenew Educator Certification Program. Although I have been creating cards for the last 13 years and I did know most of the techniques discussed in the lessons, I did pick up a few tips along the way. These classes have made me think about the creative process a little differently.
For my final challenge, I am to create one set of Masculine cards and one set of Feminine cards using at least three techniques that were discussed in the ten courses from Level 1. Also, I am to create packaging for my cards using a recycled item. Each set must include at least four to six cards each. Today I will discuss the Masculine card set I created. So let's get started!
Here are several courses I chose for my Masculine card set:
Card 1 Supplies:
Neenah Solar White 110# Cardstock
Distress Oxide Inks
Hero Arts Intense Black Ink
First off, I gererously inked up the back of the Skylight Stencil with Distressed Oxide Inks, spritzed it with a fair amount of water and applied it directly to my cardstock panel. I pressed down gently with a paper towel to pick up any excess water and pulled the stencil off leaving a pop art type of image. I die cut the word HI with my alphabet die set, heat embossed it with Altenew Antigue Gold embossing powder, adhered it to my card front and stamped a sentiment directly below it with Hero Arts Intense Black Ink. The panel was then adhered to my card base.
A different angle of my card really brings out the shine!
Card 2 Supplies:
Neenah Solar White 110# Cardstock
Distress Oxide Inks
Gold Glitter Cardstock
Hero Arts Intense Black Ink
Pixie Tape
Card 3 Supplies:
Neenah Solar White 110# Cardstock
Distress Oxide Inks
Gold Glitter Cardstock
Hero Arts Intense Black Ink
Pixie Tape
For this one I applied Pixie tape to the sides of my die cut panel to form a rectangle in the center. After ink blending Squeezed Lemonade Distress Oxide Ink in the sectioned off area I laid down my stencil and with Carved Pumpkin Distress Oxide Ink I filled in the open areas. I adhered another glitter die cut frame from the leftovers of my previous card and stamped my sentiment.
***Note***
I included the link to the Geometric Landscape Stencil as part of a bundle set. There does'nt seem to be a option to buy the stencil on its own.
Card 4 Supplies:
Neenah Solar White 110# Cardstock
For my last card I once again sectioned off a portion of the middle of my die cut panel with Pixie Tape and ink blended the area with Abandoned Coral Distress Oxide. I laid the Halftone stencil over it and ink blended with the Black Intense Ink. This time instead of die cutting my sentiment with glitter cardstock I die cut it, applied Versa Mark embossing ink directly onto it, sprinkled Altenew Antique Gold embossing powder over it and heat it with my heat gun.
Packaging:
Recycled Acetate Box From A Previous Purchase
Black And White Twine from A Privious Purchase
Double Sided Sticky Tape.
Gold Glitter Cardstock
I taped a couple sheets from the paper pack together to wrap around the box.
I cut 4 strips of another pattern from the pack, two strps to wrap around the top portion and 2 strips to wrap around the bottom portion of the gift box.
Next I die cut the Fine Frames Rectangle die out of Glitter cardstock. I kept the 3 smaller frames but at the last moment I just kept the two smaller frames. I then stamped the sentiment from the Wonderland stamp set and glued the frames to the white piece of cardstock.
That concludes Part 1 of my finale challenge. I hope you enjoyed it. These cards took several days to make and I had fun creating them. Up next is Part 2, my set of Feminine cards. I hope you will join me.
Until next time!
Rema:)

.jpg)


.png)


.png)

Fantastic CAS cards, Rema. My favourite would be the "just a note" card since it looks so elegant and classy!
ReplyDeleteThank you for sharing your wonderful work.